Day miles: 292
Trip miles: 3824
North Pole to Talkeetna
In the morning I found the bike charged and ready to go. After fueling up and spending some time at the car-wash getting the infamous Dalton Highway mud off my bike, I headed for the Parks Highway toward Denali National Park. I had found Above Alaska Aviation on the internet when searching for flight instruction in Alaska and decided I drive to Talkeetna to check them out.
I was glad to be back on the bike, and also to get out of the Fairbanks area. This was the only place I had ridden highways with more than two lanes since Vancouver, BC and I wasn’t liking it much.
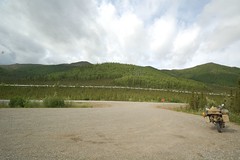
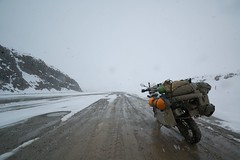
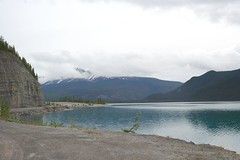
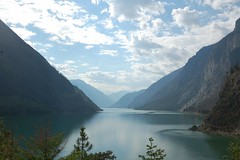
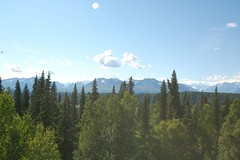 The George Parks Highway was beyond words. You’re surrounded by mountain ranges and little else for hundreds of miles. I didn’t bother taking many photos on the way down; what to take a photo of? There is no centerpiece here, just endless mountain ranges and wilderness. They act as the picture frame to everything that you do here.
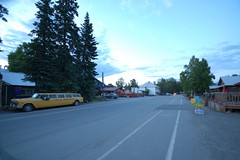
The ride was short relative to much of my prior days, so I made it to Talkeetna early and wandering around a bit, taking in the place. It immediately reminded me of Bar Harbor, Maine. Bar Harbor is about forty-five minutes drive from where I grew up, depending on the season. In the summer it can take forever due to traffic, but in other months it can be faster. It is a tourism driven town, bustling with activity in the summer as visitors come to nearby Acadia National Park. Talkeetna is the base town for those wanting to climb Mount McKinley, usually taking a glacial flight from here to about seven thousand feet up the mountain. When the tour buses were in town during the day, everything was packed, but in the evening it starts to quiet down to climbers, straggling travelers and seasonal workers.
The bulk of my flight training was ten years ago, although I did a few hours in a J-3 Cub three years ago. I did that training with George Kirkish of Vashon Island Air specifically because I thought his training in a tail-wheel airplane was the kind of instruction I wanted. In general, flying in a small airplane as opposed to a commercial airliner is like riding a bicycle or motorcycle instead of taking the bus. In both latter cases you have all the time you want to look out the window, but you tend to just yawn and do something else before too long. The old trainers like the J-3 are simple airplanes but that makes them better airplanes because you’re encouraged to focus on learning to fly where modern airplanes often have niceties to make flying easier, like an automatic transmission makes it easier to drive a car.
I didn’t intend to finish my training in Alaska; I would have had to have planned better, including bringing my pilots logbook for starters. But I hoped I could get some unique training from Above Alaska like I had from Vashon Island air, where I was challenged to fly the plane and build the skill. I walked into the hanger where I met Lance, one of their instructors. I told him my story and scheduled to go up with him in their trainer, a Champ, much like the J-3, later that night.
I liked the Champ. It was very much like the J-3 but had better forward visibility, particularly when taxiing on the ground. We spent about an hour flying around and getting used to the plane, as well as some low altitude river flying, and then landed. It was great to be in a small plane again and I was glad it was going to work out. Not only was I in Alaska, but I was flying in Alaska, and in respect to my father this was a particularly meaningful thought to have as I looked out of the cockpit over the wilderness landscape.
 I set up camp at the RV park that doubled as a boat launch along the Talkeetna River. There was a system of unofficial trails leading from here into town and plenty of space to wander around as I caught up on more phone calls due to there being service here. “Beautiful downtown Talkeetna,” as the signs and bumper stickers say, is centered on a single short street and therefore is very walkable. I planned on being here for at least a couple days to see what I could glean from flight instruction here.